This step-by-step guide walks you through the process of setting up one chat admin client for more than one different subacount on multiple tools, on the DoWellWebTools platform at YourWebEmpire.com.
|
STEP
|
|
Configure Your Main Account's Question and Answer Tool |
To use one chat client to monitor and communicate with vistors accross multiple subaccounts, you need to activate the chat on your main account's Q&A tool. First, make sure the tool is activated and configured. There are a few things that relate to the live chat:
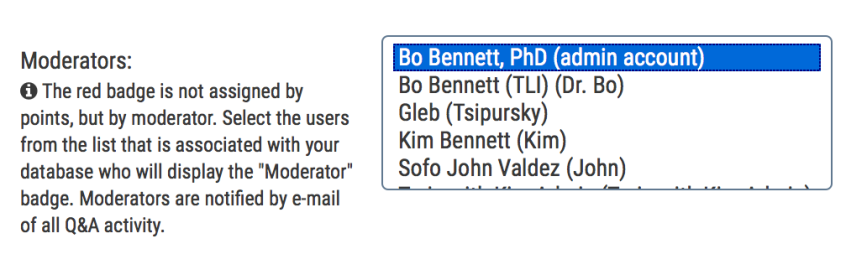
First, make sure those who will be monitoring the chat are selected as moderators (admin included). This is under the "User Scores and Badges" section. This is a necessary step.
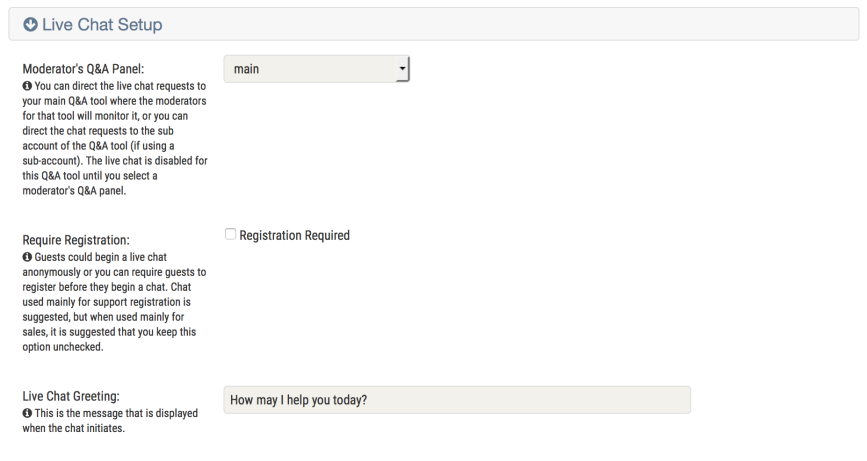
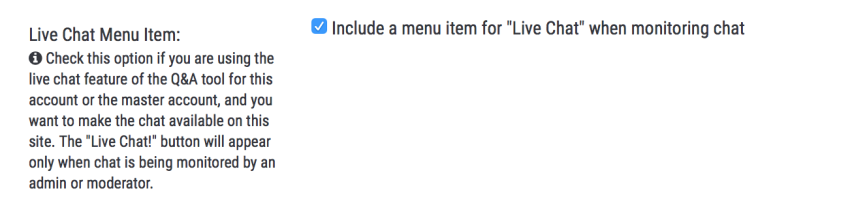
Second, in the "Live Chat Setup" section, select "main" for the Moderator's Q&A panel (this is also necessary), choose if you will require registration or not to chat (suggested for support but not sales), and change the default greeting if you want.
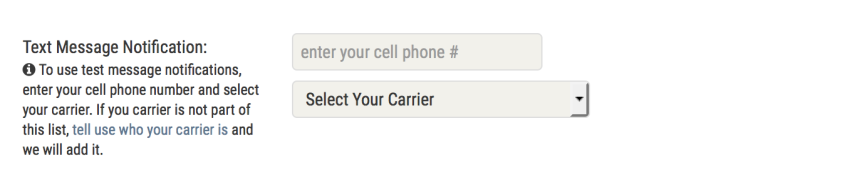
Next, if you want to be notifed by text message when someone is waiting to chat, enter in your cell number and carrier:
Then, if you want to display a sponsor message when someone initiates a chat, enter a sponsor message in the "E-mail Sponsor Message" field.

Then click the "Configure" button at the bottom of the page.
|
STEP
|
|
Add the Live Chat Menu Item On All Your Tools / Subaccounts That YOu Want To Use Chat |
Now go into the "Configure" area of each of your tools, on each of your subaccounts, that you want to use live chat. In the "Custom Header Image, Domain, Theme, and Menu" section, look for the "Live Chat Menu Item" option and select it.
Click the "Configure" button at the bottom of the page.
This "how to" continues with some more setup instructions and instructions on how to use the chat with multiple subaccounts.
|
STEP
|
|
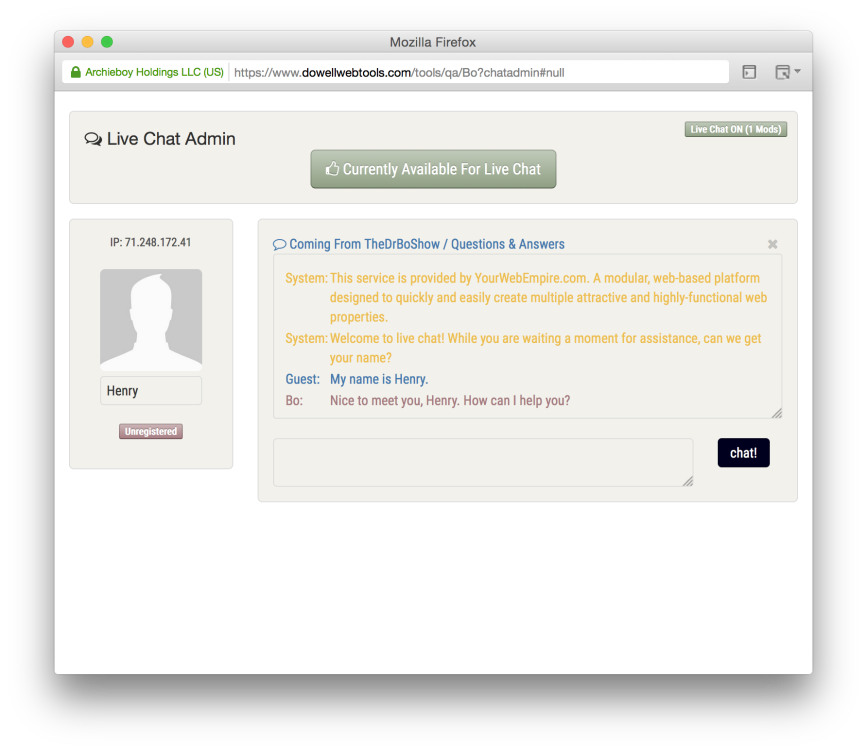
Monitoring Chat |
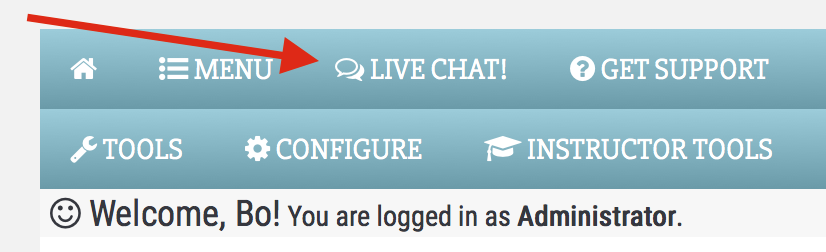
Now that live chat is setup and ready to use on all your tools, you can start monitoring chat. Once you are available for chat, the "Live Chat!" buttons will appear in the public menu of all the tools where you activated the feature.
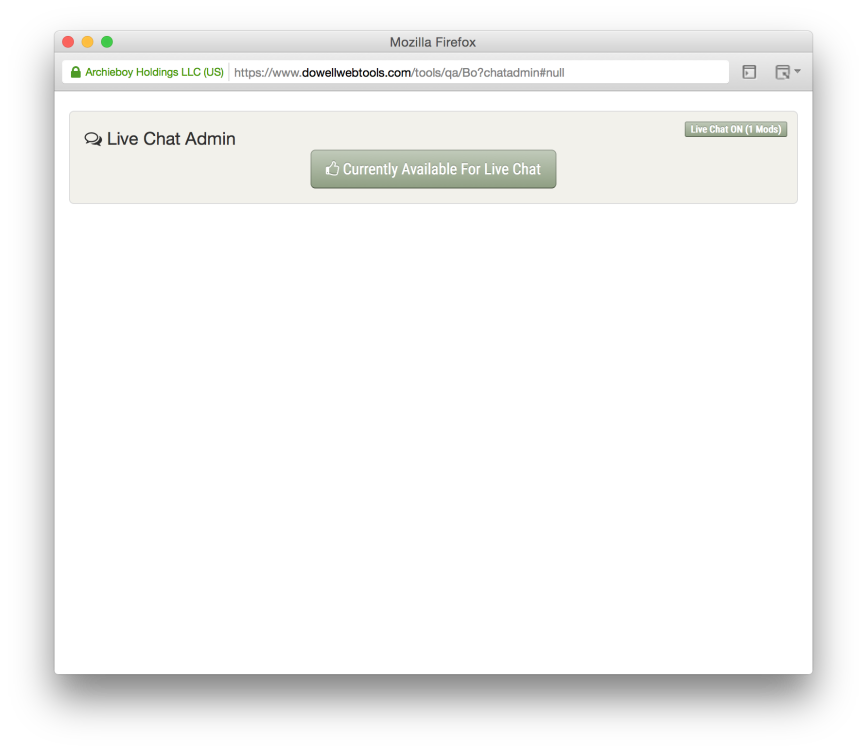
To monitor chat, to your main Q&A tool, make sure you are logged in, and look for the live chat administration panel. Click the launch button.

The chat admin window will open in a new window.
 Now you wait for a user to initiate a chat on one of your tools.
|
STEP
|
|
Set Your Posting/Chat Profile |
When you chat with a user, your photo, name, title, and bio will be available to the user.
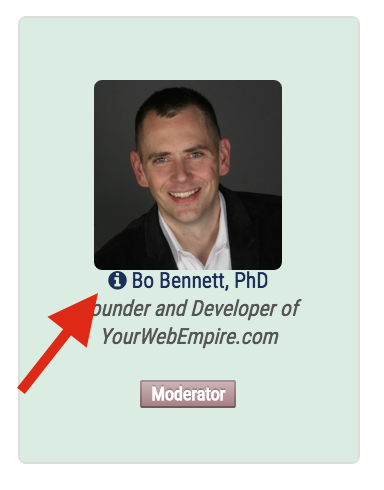
If the user clicks on your name they will see more details...
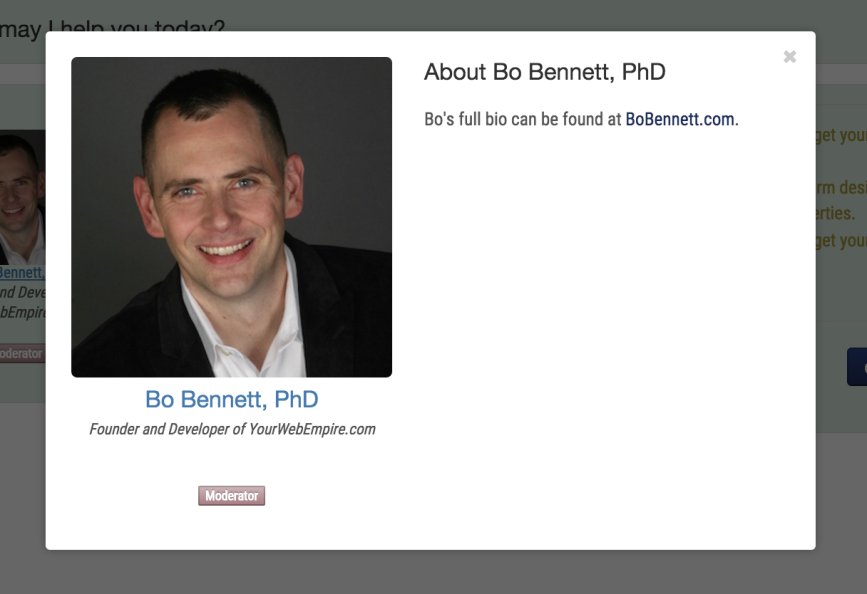
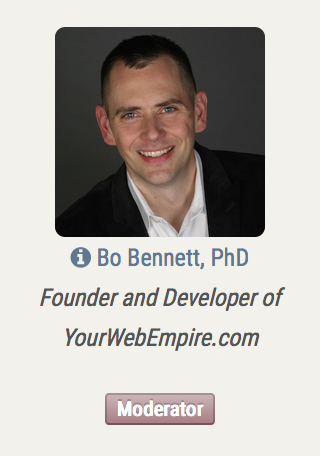
Your photo and your name are taken from your master account profile. But the title and your bio are customized within the Q&A tool. You need to first make a post, then view the post (question or answer), in order to customize your chat details. So when viewing one of your posts, you will see your information in the left column:
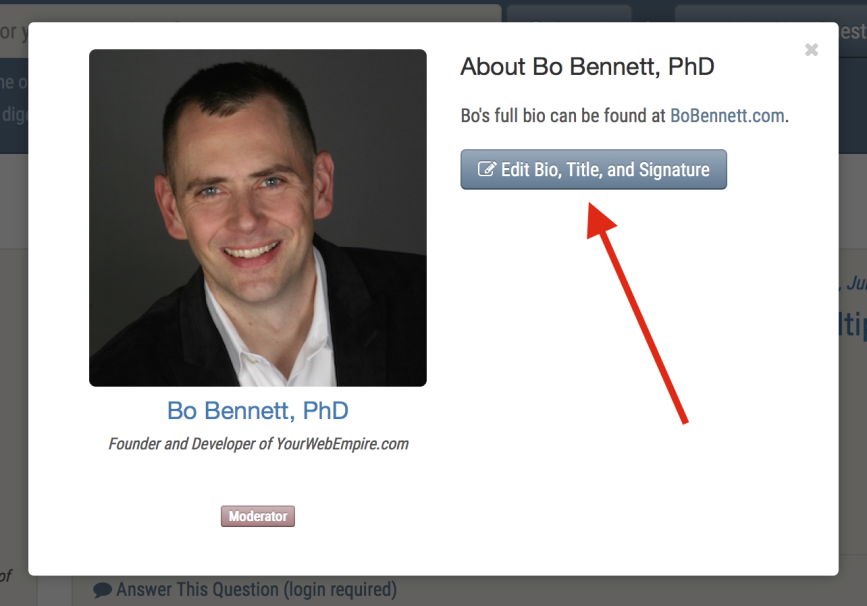
Click on your name. Then when the modal window comes up, click on the button to edit your details:
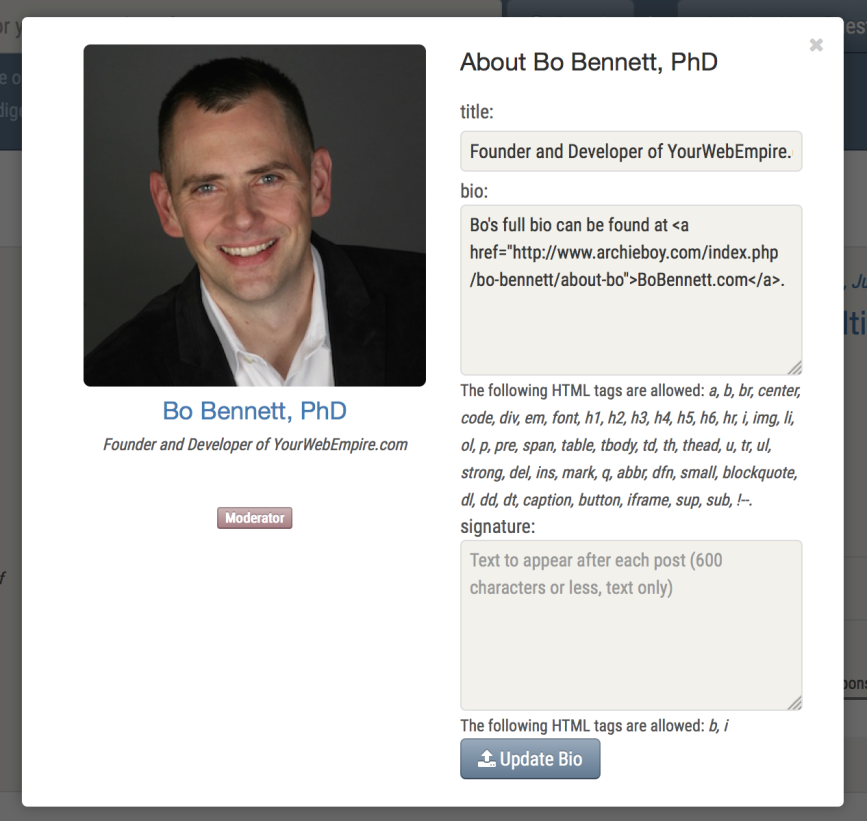
Click the "Update Bio" button.
|
STEP
|
|
Start Chatting! |
Once a user initiates a chat, they will communicate with you through a pop-up window that uses the theme of the account they launched the chat from, while your chat moderator window will always have the theme of the main Q&A tool.
User's view:

Moderator's view: